Are you getting excited about your upcoming garden, flower bed, or vegetable patch? Wondering how to start plowing a garden?
Well, you’ve come to the right place. There are a few things to consider to get started on any type of garden.
Want to learn more in detail about how to plow a garden? Read on to find out how to start plowing garden soil!
Choose the Right Time
The goal is to plow the soil when it’s neither too wet nor too dry. There is no definite timeline as to when the soil should be plowed since it depends on the soil type and climate. Generally, however, plowing is done in the late winter or early spring, after the weather begins to break and the soil has had a chance to thaw.
If possible, test the soil’s moisture content before plowing. If it feels like a wrung-out sponge, it’s likely damp enough to plow. Afterward, use a rake or harrow to till the soil and level it out. Research your local climate and soil type to make sure you choose the right time to plow your garden.
Gather the Right Tools and Equipment
Before beginning the plowing process, make sure you have everything you need to complete the job effectively. You will need this tool, a spade, a shovel, a rake, a hoe, and a tiller. The spade and shovel will be used to make furrows and rows, while the rake and hoe come in handy for smoothing them out and removing weeds and stones. A tiller is a very useful piece of equipment that allows you to work the soil more quickly and efficiently.
Additionally, you should also have a supply of wood or metal stakes to mark off the area you plan on plowing. Make sure to wear protective clothing to guard against any debris and dirt thrown up by the plow. This simple guide provides you with a straightforward method for gathering the right tools and equipment needed to plow a garden.
Clear the Area
Remove any debris or sticks from the ground, as they can damage the blade or motor while plowing. If plants are still in the ground, dig them out with a shovel and leave the roots in the soil to help break them up as you plow.
As you work, check for any irregular protrusions in the ground that might cause accidents and remove them. If the soil is too dry, water the area a few hours before plowing to create the right workable consistency.
Mark Your Rows
Once you have determined the width of your rows, it is time to mark them off. One simple way to begin marking your rows is to take a length of string or rope and use it as a guide to mark the entire length of the garden. Measure out the predetermined width and drive stakes into the ground with a rubber mallet at either end of the row.
Tie the string in between the two stakes and press it flat onto the ground. Remove the string and the stakes and you should be left with a line in the dirt that you can use to guide your plow. Now that you have your rows marked, you are ready to begin plowing your garden!
Level the Soil
The next step in plowing a garden is to level the soil. This should be done carefully to ensure the garden is even and level. Before plowing, check the ground for rocks or debris that could get caught in the plow. Remove anything that could pose a threat.
Before plowing, use a rake or hoe to even out the garden. Use a flat shovel to scrape the soil on one side, filling in any holes or low spots. It is best to make sure the two sides of the garden are even, or the plow may not cut evenly and could cause issues with the soil. Once the soil is level, start to plow the garden.
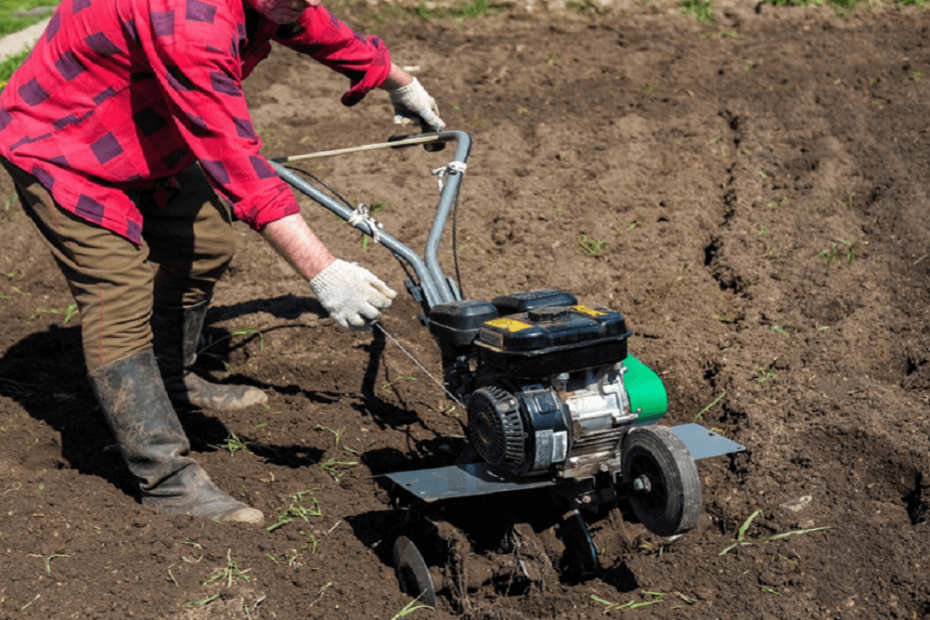
Start Plowing
Once you’ve cut a line in your garden, turn the plow to break the hard soil up. Continue going back and forth over complete sections of the soil to ensure that all clumps of dirt and roots are turned over.
After plowing the entire garden, use a rake to level out the surfaces for plants.
One of the most important aspects of plowing is to ensure that you overlap your rows and turn at the end. Doing this will help break up the soil, reduce soil compaction, and allow air and water to more freely penetrate the earth.
When plowing the garden, go continuously in one direction. The plow should create a narrow-toothed furrow, no wider than twelve inches deep, and six inches wide at most.
When finished with each row, turn the plow at a 90-degree angle to the start of the previous row. This will help create nice, even furrows for planting. Turning toward the end will also make it easier to begin the next furrow. Working the soil should be done early in the season and repeated periodically over the year.
Add Amendments
After plowing a garden, it is important to add amendments. Amendments can improve the soil structure and fertility, and enhance water retention. To achieve this, begin by placing ample amounts of organic matter spread around the surface of the soil.
This organic matter can come in the form of compost, manure, or leaf mold. Use a rake to mix and evenly distribute the amendments throughout the surface layer. It is best to work with a small area at a time to ensure thorough mixing. Once mixing is complete, lightly water the soil.
This will help the amendments settle and absorb nutrients. When adding amendments, it is important to consider the composition and content of the soil to ensure the best possible results. After amendments are added, the garden can be further prepared for planting.
Learn How to Plow a Garden
Overall, plowing a garden is no auto-pilot job and needs some new gardening skills, and requires some practice and manual effort. Careful attention to detail and the process in this guide on how to plow a garden will help any novice start their journey of getting prepared for a flourishing garden.
Aspiring gardeners should use the information in this guide to get started on getting their garden ready for planting. So, let’s get our hands dirty and begin plowing the garden!
Should you wish to read more articles aside from these gardening tips, visit our blog.